You Only Plan Once
Paper: You Only Plan Once: A Learning-Based One-Stage Planner With Guidance Learning
Video of this paper can be found: YouTube, bilibili
Some realworld experiment: YouTube, bilibili
 |
 |
Introduction:
We propose a learning-based planner for autonomous navigation in obstacle-dense environments which intergrats (i) perception and mapping, (ii) front-end path searching, and (iii) back-end optimization of classical methods into a single network.
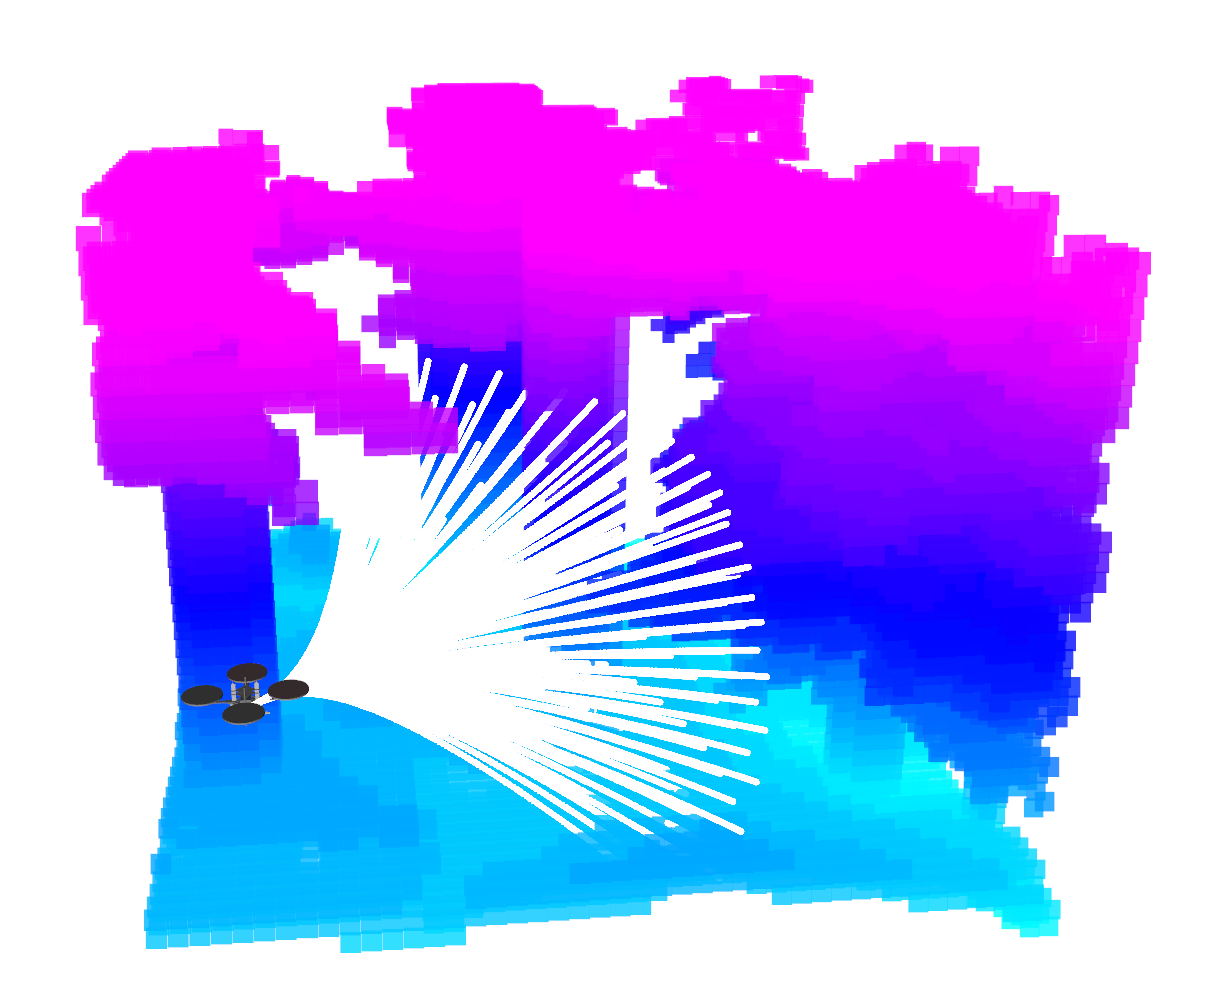
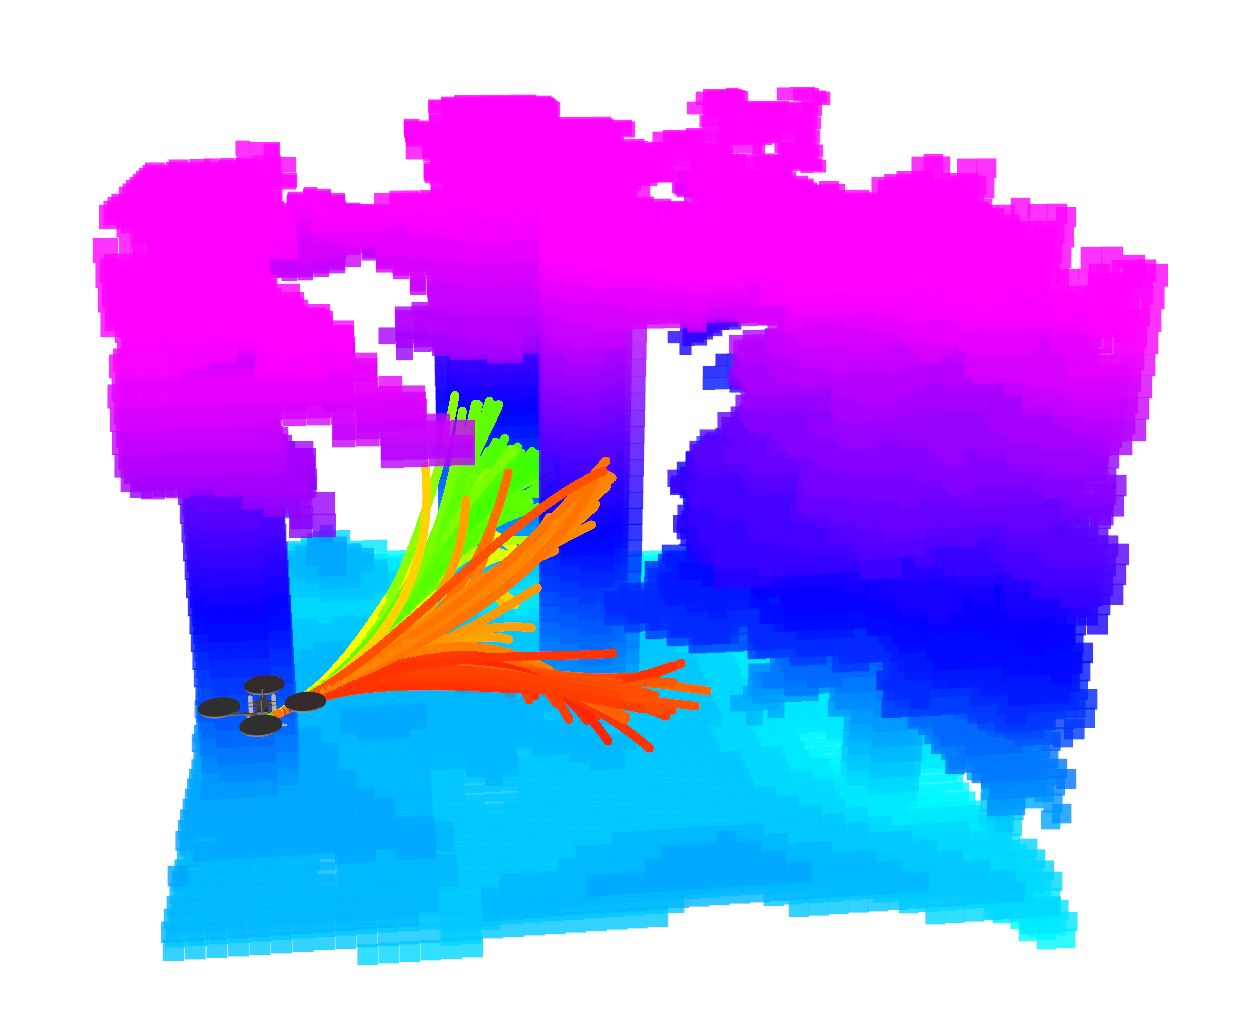
Learning-based Planner: Considering the multi-modal nature of the navigation problem and to avoid local minima around initial values, our approach adopts a set of motion primitives as anchor to cover the searching space, and predicts the offsets and scores of primitives for further improvement (like the one-stage object detector YOLO).
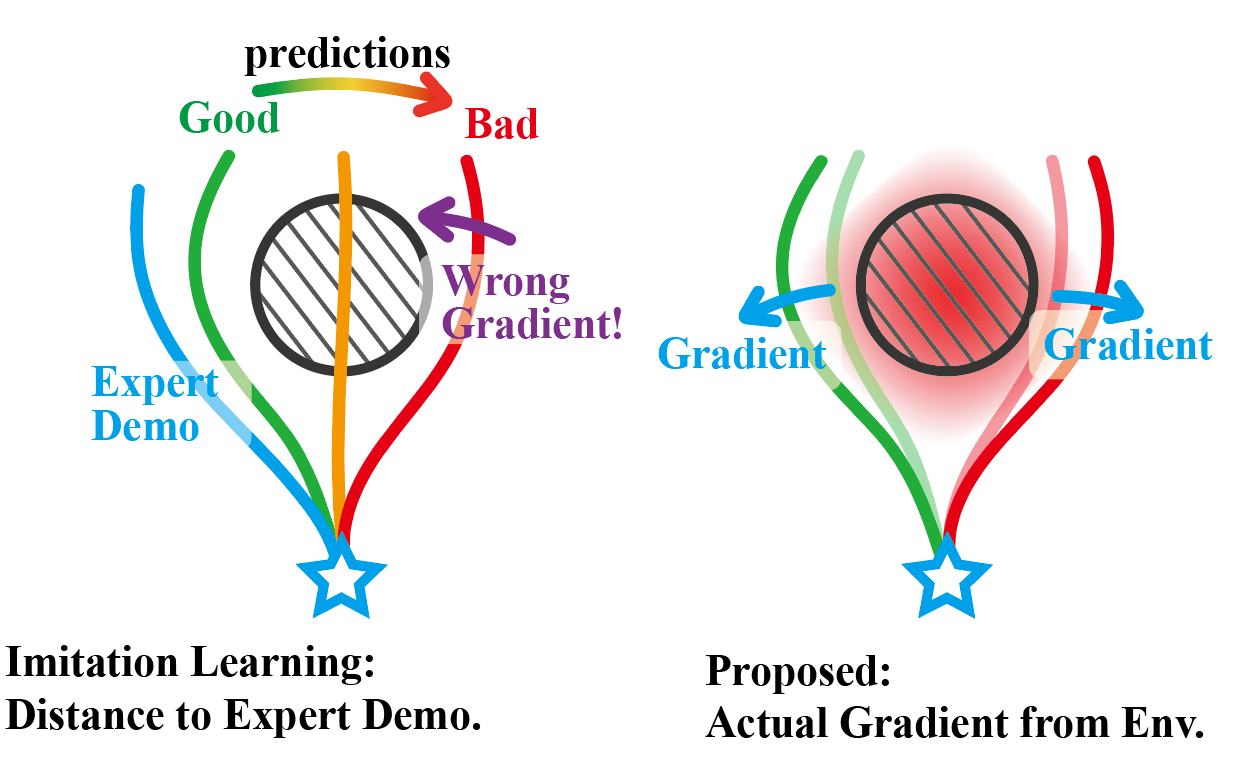
Training Strategy: Compared to giving expert demonstrations for imitation in imitation learning or exploring by trial-and-error in reinforcement learning, we directly back-propagate the numerical gradient (e.g. from ESDF) to the weights of neural network in the training process, which is straightforward, accurate, timely, and simplifies data collection.
 |
 |
 |
| primitive anchors | predicted traj and scores | learning method |
Acknowledgements:
This project is developed based on the open-source simulator Flightmare, the gradient computation is modified from grad_traj_optimization, and the signed distance field is built by sdf_tools. thanks for their excellent work!
Installation
The project was tested with Ubuntu 20.04 and Jetson Orin/Xavier NX.
0. Clone the code
git clone git@github.com:TJU-Aerial-Robotics/YOPO.git
We will take the directory ~/YOPO as example in the following.
1. Flightmare dependencies
Make sure that you have already set up the basic dependencies such as ROS, CUDA, and Conda.
sudo apt-get update && apt-get install -y --no-install-recommends \
   build-essential \
   cmake \
   libzmqpp-dev \
   libopencv-dev \
   libpcl-dev
2. Add sourcing of your catkin workspace as FLIGHTMARE_PATH environment variable
# modify "~/YOPO" to your path
echo "export FLIGHTMARE_PATH=~/YOPO" >> ~/.bashrc
source ~/.bashrc
3. Unity
Download the Flightmare Standalone uploaded by uzh-rpg
/agile_autonomy, extract it and put in the flightrender folder.
It should looks like:
flightrender/
├── CMakeLists.txt
└── RPG_Flightmare/
    ├── flightmare.x86_64
    └── ...
4. Create a conda virtual environment
Below are the versions of my python libraries. (You can remove the version numbers if compatibility issues occur in the future.)
conda create --name yopo python=3.8
conda activate yopo

conda install pytorch==2.4.1 torchvision==0.19.1 torchaudio==2.4.1  pytorch-cuda=11.8 -c pytorch -c nvidia
pip install opencv-python
pip install gym==0.21.0 stable-baselines3==1.5.0
pip install scipy==1.10.1 scikit-build==0.18.1 ruamel-yaml==0.17.21 numpy==1.22.3 tensorboard==2.8.0 empy catkin_pkg
5. Build the flightlib
conda activate yopo
cd YOPO/flightlib/build
cmake ..
make -j8
pip install .
6. Some issues may arise when we test on different devices
6.1. No module named 'flightpolicy'
# modify "~/YOPO/flightpolicy" to your path
echo "export PYTHONPATH=$PYTHONPATH:~/YOPO" >> ~/.bashrc
source ~/.bashrc
6.2. No module named 'flightgym'
cd YOPO/flightlib/build
pip install -e .
Train the Policy
1. Data collection
For efficiency, we proactively collect dataset (images, states, and map) by randomly resetting the drone's states (positions and orientations). It may take nearly 1 hour for collection with default dataset size but you only need to collect once. The data will be saved at run/yopo_sim.
cd ~/YOPO/run
conda activate yopo
python data_collection_simulation.py
Besides, you can refer to vec_env.yaml and quadrotor_env.yaml for modifications of the environment and quadrotor.
2. Training
cd ~/YOPO/run
conda activate yopo
python run_yopo.py --train=1
It may take 2-3 hours for training with default dataset size and training epoch. If everything goes well, the training log is as follows:

Besides, you can refer to traj_opt.yaml for some modifications of trajectory optimization (e.g. the speed and penalties).
Test the Policy
You can test the policy using pre-trained weights we provide at run/saved/YOPO_1/Policy/epoch0_iter0.pth. (For example, to use the weights of YOPO_1/Policy/epoch2_iter3.pth, you should use --trial=1 --epoch=2 --iter=3)
1. Test without dynamics model and controller (simple but not recommended)
cd ~/YOPO/run
conda activate yopo
python run_yopo.py --train=0 --render=1 --trial=1 --epoch=0 --iter=0 --supervised=0
It will take a while for unity setup, and then you will see:

2. Test with dynamics model and controller (recommended)
Prapare: We do not use the built-in dynamics of Flightmare; instead, we used a ROS-based simulator and controller from Fast Planner. For your convenience, we have extracted only the relevant sections from the project, which you can refer to UAV_Simulator for installation.
Besides, we recommend using tmux & tmuxinator for terminal management.
2.1 Start the simulation environment with Unity and the ROS interface (It will take some time to load Unity and randomly generate a new environment)
cd ~/YOPO/flightrender/RPG_Flightmare
./flightmare.x86_64
cd ~/YOPO/flightlib/build
./flightros_node
Besides, you can refer to quadrotor_ros.yaml for some modifications of the environment.
2.2 Start the dynamics simulation and controller of UAV
cd ~/UAV_Simulator
source devel/setup.bash
roslaunch so3_quadrotor_simulator simulator.launch
2.3 Start the YOPO inference and the Planner. You can refer to traj_opt.yaml for modification of the flight speed (The given weights are pretrained at 6 m/s and perform smoothly at speeds between 0 - 6 m/s).
cd ~/YOPO/run
conda activate yopo
python test_yopo_ros.py --trial=1 --epoch=0 --iter=0
cd ~/YOPO/flightlib/build
./yopo_planner_node
The implementation of
yopo_planner_nodeandtest_yopo_ros.pyare merged intotest_yopo_ros_new.py(justpython test_yopo_ros_new.py).
2.4 Visualization: start the RVIZ and publish the map.
Then you can click the 2D Nav Goal on RVIZ as the goal at will, just like the following GIF.
cd ~/YOPO/
rviz -d yopo.rviz
(optional) Wait for the map to be saved by flightros_node and then:
cd ~/YOPO/flightlib/build
./map_visual_node

TensorRT Deployment
We highly recommend using TensorRT for acceleration when flying in real world. It only takes 1ms for inference on NVIDIA Orin NX.
1. Prepera
conda activate yopo
pip install -U nvidia-tensorrt --index-url https://pypi.ngc.nvidia.com

git clone https://github.com/NVIDIA-AI-IOT/torch2trt
cd torch2trt
python setup.py install
2. PyTorch model to TensorRT model
cd ~/YOPO/
conda activate yopo
python yopo_trt_transfer.py --trial=1 --epoch=0 --iter=0
3. TensorRT inference
cd ~/YOPO/
conda activate yopo
python test_yopo_ros.py --use_tensorrt=1
Finally
We are still working on improving and refactoring the code to improve the readability, reliability, and efficiency. For any technical issues, please feel free to contact me (lqzx1998@tju.edu.cn) 😀 We are very open and enjoy collaboration!
If you find this work useful or interesting, please kindly give us a star ⭐; If our repository supports your academic projects, please cite our paper. Thank you!